Residential Roofing San Diego: Trusted Local Experts
Protecting your home starts from the top. At San Diego County Roofing & Solar, we specialize exclusively in providing the residential roofing San Diego homeowners trust. Your roof serves as your home’s primary defense against the harsh elements. We aim to make the entire roofing installation process completely seamless, safeguarding your property with superior craftsmanship and high-quality materials.

Your Trusted Roofing Specialists in San Diego County
Finding dependable roofing contractors doesn’t have to be a difficult task. Our highly experienced team proudly serves all of San Diego County. With extensive knowledge of the roofing industry, we provide custom roofing solutions precisely tailored to your house. Whether you need expert repairs or a full roof replacement, our comprehensive roofing services focus purely on residential properties to protect your valuable investment.
Premium Materials for Your New Roof
Selecting the right materials is absolutely essential for long-term durability. Roofing materials should be selected based on local climate conditions and fire zones. Proper installation quality is critical for roof longevity. We proudly offer diverse options to ensure your new roof matches both your vision and your budget perfectly.

Let’s get started on your roofing project!
To get started with a free estimate and consultation, fill out the form below.
Cost-Effective Asphalt Shingles
Asphalt shingles remain the most common and cost-effective roofing option. Typical costs for architectural asphalt shingles range from $5.50 to $14 per square foot. Cool roof asphalt shingles reflect more sunlight and absorb less heat, making them an excellent, energy-efficient choice for California.

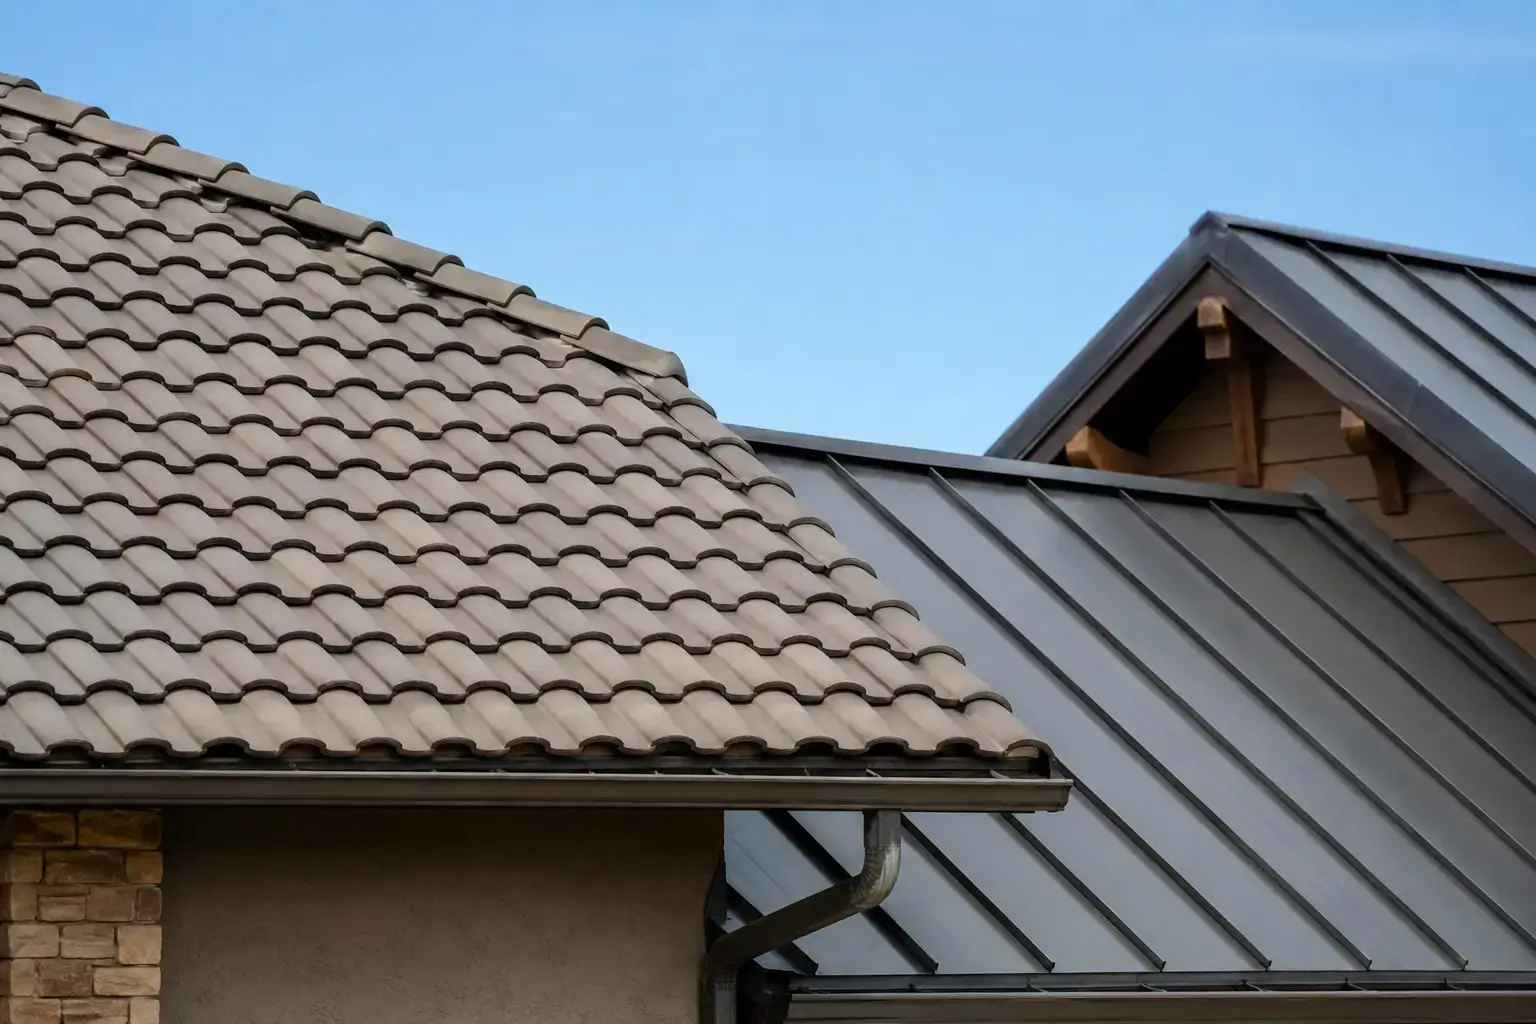
Durable Concrete, Clay, and Metal Options
Concrete and clay tiles provide high fire resistance. Concrete tile performs exceptionally well in sunny climates. Heavy roofing materials such as clay tiles require adequate support from the roof structure. Metal roofing is durable and reflects heat, boasting a lifespan of 40 to 70 years. Stone-coated steel roofing offers excellent wind resistance.
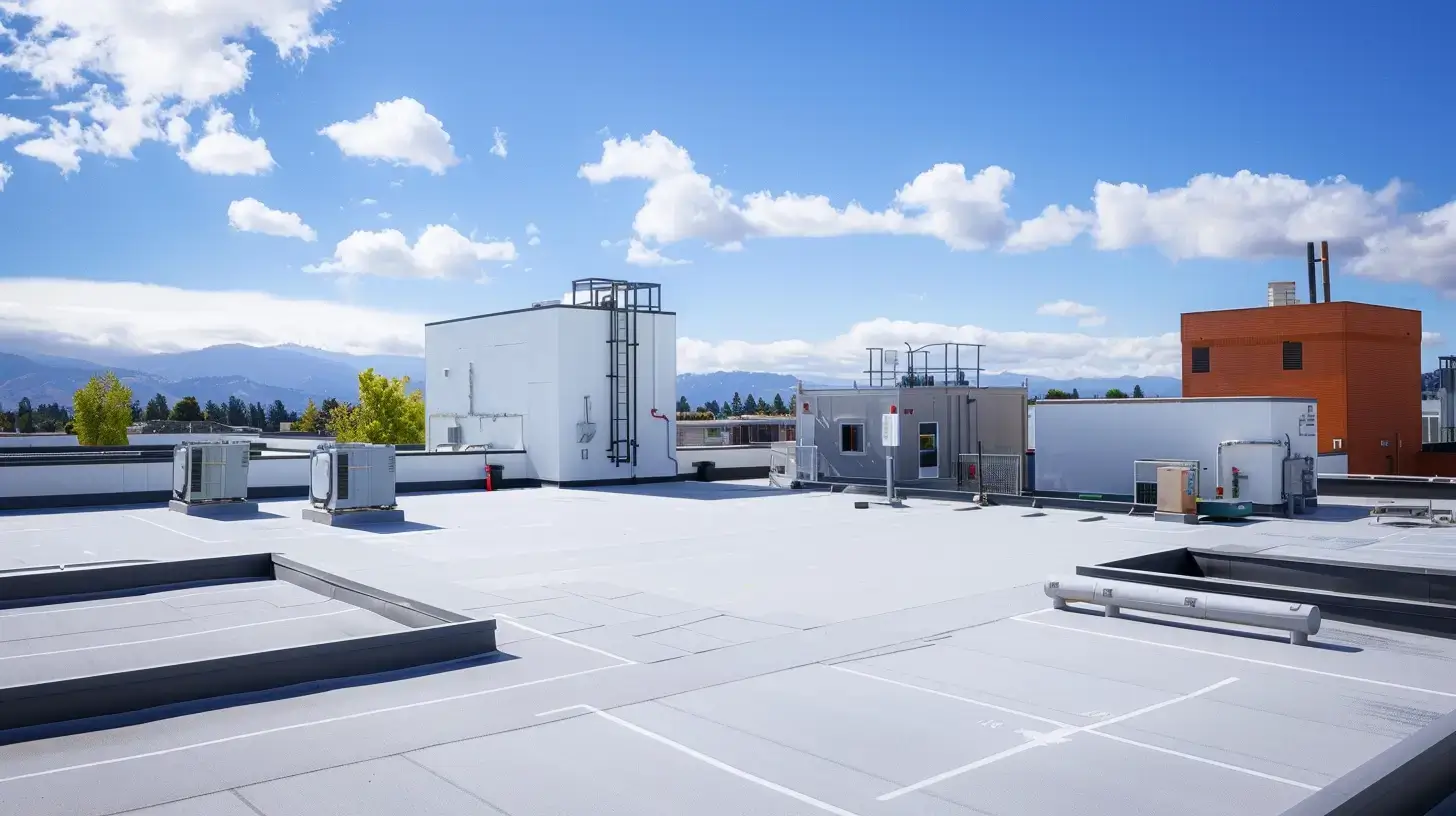
Flat Roofing Systems for Modern Homes
Flat roofing systems are common for low-slope modern homes. These flat roofing systems include durable materials like TPO, PVC, and EPDM. They provide superior waterproofing and minimal maintenance over the years. Our team ensures precise installation, preventing pooling water and protecting your house from leaks.
The Residential Roof Replacement Process
Replacing an entire roof is a significant undertaking. We maintain clear communication throughout the project. From the initial consultation to final cleanup, we coordinate permitting, material delivery, installation, cleanup, and final inspection to reduce disruption throughout the project.
Professional Installation and Site Preparation
The typical roofing installation process includes inspection, permitting, and site preparation. Before we install your new roof, we protect your landscaping. Residential roof installation in San Diego typically takes 1 to 3 weeks from contract signing to final inspection. We respect your schedule and HOA rules.
Protecting Your Home from the San Diego Climate
San Diego experiences year-round UV exposure and varying weather conditions. High reflectivity materials can reduce air conditioning usage. Many roofing products in California comply with reflective finish requirements. Coastal locations require salt-resistant roofing materials to prevent rapid deterioration. We provide specialized solutions keeping your property in pristine condition.
Flexible Financing Options for Your Property
We believe securing a safe roof should be accessible to everyone. Financing options are available for roofing projects to ease your financial burden. Whether facing an emergency or planning a major upgrade, we help you protect your home without draining your money.
Budget-Friendly Savings and Free Estimates
Some roofs start as low as $99/month with financing. Flexible financing is offered through partnerships with credit unions. These financing options help make home remodeling affordable. Contact us for free estimates; comparing detailed estimates can clarify the value in roofing projects to protect your budget.
Why Choose Our Roofing Company?
Our satisfied customers consistently praise our team for delivering outstanding quality. As a local residential roofing contractor, we take immense pride in our fully licensed, bonded, and insured professionals. Trust our dedicated team to perform flawless replacements and expert roof repair safely.

Warranties That Protect Your Investment
We stand behind our work with comprehensive warranties. Our company provides a robust 10-year warranty on labor and materials. Because proper installation quality is critical for roof longevity, we never cut corners. Rest easy knowing your written warranty explains the applicable workmanship and material coverage, terms, and exclusions.
PHONE | TEXT
WORKING HOURS
Sat-San Closed

Start Your Residential Roofing Project in San Diego
Your home deserves a roofing system built for San Diego’s climate, your property’s design, and your long-term needs. Contact San Diego County Roofing & Solar to schedule a professional roof assessment, discuss suitable material options, and receive a clear, detailed estimate for your residential roofing project. Our team is ready to help you protect your home with dependable workmanship and a solution tailored to your budget.
Request Your Free Residential Roofing Estimate Today!
FAQ
We understand that homeowners often have questions before starting a major property project. We address the most common concerns regarding our residential roofing services below to ensure you have all the information you need to move forward with confidence.